It's bitter sweet: your infant sleeps 11 hours and you're amazed, but you wake up with the most engorged breasts ever. No biggie, nursing should take care of it. Later that morning I started to experience pain on the underside of my right breast. I figured it was related to the engorgement and that after nursing a few times it would resolve itself. Well it got worse that night. In fact it kept me up worrying that night because of all the internet research I did on the topic. I didn't want to end up with mastitis. That night when the baby woke up at 3:30 (far earlier than she would normally) I welcomed it as another opportunity to try and relieve the pressure of the clog. Then I used our microwavable heating pad and kept it on the affected area until I fell asleep. Day two I really went full force with treatment techniques. I took a warm shower and massaged the area. I nursed that side first on all occasions. I varied my nursing positions to make different points of pressure. In between nursing sessions I used the heating pad. It did feel noticeably better by the end of that day but there was still localized pain. I went to bed with the heating pad again. Finally after waking up on day three it feels so much better and I think I'm in the clear, thankfully. I'm heading on vacation next week and I would hate for this to become a full blow infection before I go.
My advice if you think you have a plugged duct is to aggressively treat yourself as soon as possible. Use heat, pressure, and nursing/pumping often. If I had still felt the same level of pain when I woke up on day three I would have called the doctor. I checked my temperature as well because flu symptoms are a sign of mastitis. If you have a fever or feel like you have the flu when you notice a plugged duct, call your doctor immediately.

Wednesday, July 13, 2011
Tuesday, June 28, 2011
Our Napping Breakthrough
It's finally happened. Today our little lady took a three hour nap! The cherry on top was it was at the same time our son takes his afternoon nap. I took time to clean out my closet! It was really a surreal day.
With both children the days of sleeping all day went out the window at about six weeks of age. From then it's a struggle until a day like today. It starts out where the infant can't sleep any longer than 30 minutes. A 30 minute nap isn't long enough for most babies to feel their best. It takes the edge off their exhaustion but they need longer periods of sleep to feel rested and happy. I don't recall the exact time which our son started taking longer naps, but our daughter is just barely three months.
My technique was once the baby was having trouble sleeping longer than 30 minutes in any location (I kept her out in her bassinet in the living room for the first few weeks), I started to put her down in her crib. I'd close the blinds, and swaddle her just as if she was going down for the night. Both going down for a nap and going down for a nap started with pats and bounces until she dozed off. Now both routines go swaddle and pacify. Being able to put yourself to sleep is a very important skill for a baby, and once they have that down things get easier and easier.
The trick is knowing your baby's routine and knowing the signs of when they are tired before they have a breakdown. For our three month old she is able to tolerate no more than two to three hours of awake time. So, I keep track of when she wakes up and around two hours from then she's either already a bit fussy, or she will be soon so I watch her. I also don't nurse her to sleep for naps or bedtime. I make sure she eats, and she's burped adequately before I try to put her down. Sometimes her fussiness at hour two is just hunger and not exhaustion.
Lastly, napping during the day does not necessarily correlate with sleeping better at night. Kids need naps to function. Plus, the more they sleep the better it is on their fast growing body and brain. Granted, a long nap just before bedtime can create a challenge for that evening, but a three hour nap in the afternoon might be just what they need. Again, following a routine that includes monitored periods of awake time has worked the best for our kids.
Monday, June 27, 2011
Typical Day?
Things are still settling in as we're adjusting our infant daughter to a routine, but finally this week it feels like something is loosely coming together. Some mornings my husband is working from home and can hold one child or the other while I shower, but this morning he left early and feeding and clothing the children was left up to me. It went reasonably well so I thought I'd share the run down.
6:00 a.m. - The baby girl wakes up. I grab her and bring her to bed and nurse her there. She eats on one side only and passes back out.
6:30 a.m. - I sneak out of bed quietly and head to the living room to pump the other side. Once that's done I fill the utility sink in the laundry room with water and put in the cloth diapers. They'll need to sit for a few hours and soak.
7:00 a.m. - Sneak back in bed for a little more r&r, mainly checking emails and Facebook on my phone.
7:30 a.m. - Baby girl wakes up again so this time I figure it's for good until her nap. We coo and talk to each other in bed until she starts to fuss. Then I walk her a bit, take her to her room and put her in some clothes. Since she still seems happy, I bring her bouncy chair to the doorway of the master bathroom. That way she can see me as well as the light coming through the shutters which she thinks is pretty cool. I take a shower! I bring her out to the family room and put her in her rocker bassinet.
8:30 a.m. - The boy wakes up! I take him to the living room too and put him on the couch. I turn on the TV in time to catch The Cat in the Hat on PBS. I make a bowl of cereal and a cup of coffee. I feed the boy cereal, we share the bowl, and keep the girl entertained by talking to her.
9:00 a.m. - The baby girl is fussing again so I feed her. It's been 3 hours. Super Why comes on next.
9:20 a.m. - After a burp baby girl is still a bit touchy so I'm assuming she's tired. I change her and take her to her room. No more rocking or pacing for her. She gets put down, swaddled, and pacified now. She usually can put herself to sleep. Once she's down I go back to the laundry room and drain the sink and put the diapers and covers in the wash.
9:30 a.m. - I make a sippy cup of watered down Mots for Tots for the boy and bring it to him. Then I collect his clothes from his room and dress him while he's still watching TV. Now his favorite show is on, Dinosaur Train. He's pretty agreeable at this point. I had a load of laundry that was washed last night but not folded sitting on our chair so I fold that and put the clothes away.
10:00 a.m. - The TV goes off. This usually comes with a bit of resistance, but it's minor as long as you have something else interesting to do. The baby wakes up, this nap was a short one. I tried to pacify and walk out, but after another 5 minutes she's crying again. I get her up. We go into the boys room and play.
10:45 a.m. - Baby girl gets another change and while she's tolerating our play, she still seems tired. I try to put her back down and it works. Sweet. But, now the boy is playing but getting cranky too. Usually a hunger issue. I get a Gogurt and feed it to him.
11:30 a.m. - Mommy and the boy are both showing signs of hunger. I microwave the left over Chinese in the fridge. The boy loves the noodles. He fights eating lunch at first, but eventually comes around.
Noon - Lunch is done and so is the laundry. The boy and I go outside and he helps me put the diapers on the clothesline. Then he plays with his trucks or his water table while I supervise.
12:15 p.m. - The baby wakes up again and I bring her outside with my Brest Friend and feed her. Finally the nap helped and she's in a good mood, watching her brother. This playing outside goes one while I change the baby two or so more times and put her in her playgym for some tummy time.
1:30 p.m. - I coax the boy back inside and we change his diaper and wash his hands. Then back to his room for more play.
2:00 p.m. - Bring both kids into the living room and put the baby back in the bassinet. The boy picks a couple of books to read. Today it was Koala Lou and Cloudy With a Chance of Meatballs. The baby is getting tired again so I give her a pacifier and the boy gets his pacifier when we read the last book.
2:20 p.m. - The boy gets carried to his room and put in his crib for his nap. Then I come grab the girl and bring her to her room where she gets another change, a little snuggle, and then back swaddled in her crib. I go outside to grab the diapers off the clothesline and put them in the dryer for a light toss so they're not so crispy.
2:45 p.m. - I start this blog entry! I wanted to jot it all down while I could remember what happened when. The beeper just went off on the diapers so I'll get to folding those in a moment. I estimate the baby will wake up pretty soon as it has almost been 3 hours since she ate. I am enjoying this small moment of quiet though!
Thursday, June 23, 2011
When Cloth Won't Do...
I am a die hard cloth diaper fan. But there are a few instances when I rely on a disposable diaper instead. With two in diapers, and one who I was extremely interested in having sleep through the night without disturbance, I've been using more and more disposables lately.
Our son was having a reaction to our cloth diapers at night. The prefolds we use are over a year old, and while we follow proper washing and rinsing instructions there is build-up that cannot be denied. This was causing an ammonia reaction which was irritating our son's skin. This only happened when a diaper was on him for an extended period of time, like overnight. If I have absolutely no choice and have to run to the grocery store for diapers I admit I choose Huggies. I prefer them far over Huggies or even the generic brands like Mom to Mom. But, I do have a choice if I can think ahead.
I found a compostable brand that works very well. I use GroVia Biodiapers. I use them at night on both babies as I want to avoid any reason for our three month old to wake up in the middle of the night. These diapers are available at a local retail store, the same store where I have our diaper service from. But, you can also find them on Amazon. I can get the size 2 diapers for our daughter on Amazon, but our son really needs size 4. I was able to find them on Diapers.com for a decent price as well.
The absorbency of these diapers rivals the big brands. They just don't have the additives, so odor isn't masked quite as well, but the kids feel dry. My only other criticism is that they seem to be designed for children on the thin side. The waistband is a little bit tight on our two and a half year old, which is the only reason he's in size 4. Weight wise he would technically be able to fit in size 3 but they seem a little too snug in the waist.
We do not have the skin reactions we used to and our daughter sleeps soundly at night. I also use these diapers when we are going out somewhere where diaper changes aren't going to be very convenient. We are planning to go to Hawaii next month and will use solely GroVia.
Friday, June 10, 2011
Nursing Pads
Here is my review for nursing pads based on a fairly limited product base. I'd like to say I've tried a variety of brands and makes, but that's not true. However, I did zero in on my recommendation rather quickly.
With my son I was given reusable pads. I don't honestly even know what they are made out of. Sometimes I would remember to put them in when I'd get dressed in the morning, many times I would not. I'd be reminded as I leaked through a shirt while I was away from the house. I definitely didn't wear them at night. Once my kids slept mostly through the night there was no way they were absorbent enough to handle that situation. I would take a burp cloth, fold it up, and stuff it in my bra at night. Even that wouldn't be enough sometimes. But with the first child I never imagined there was an alternative. I just figured nursing pads sucked!
Until one day I saw a box of disposable nursing pads at my sister's house. She had the Medela brand pads. Before purchasing a box of my own I went on Amazon and checked the reviews of other brands. In fact, Lanisoh nursing pads were the highest rated so I got a 60 pack. To be fair I borrowed 6 of the Medela pads from my sister and gave her a few of mine to get a comparison.
Lanisoh outperformed the Medela pads in my opinion. Both disposable pad brands outperformed the reusable ones (obviously)... I use cotton diapers and made homemade wipes but when it comes to nursing pads I'm sorry, I must support the disposable variety. They hold a significant amount of liquid. Rather than sleeping with a bulky bra, I can rest easy when I have pads in. The Lanisoh pads just have a slightly higher quality look and feel. They have two spots where you remove a liner paper and expose the adhesive to attach to the inside of your bra cup. The Medela pads only have one spot. When nursing, you're constantly pushing down the pull down section of your bra and the pad can easily bunch and dislodge. This happens less often with the Lanisoh pads. They really stay put.
Price is relatively competitive, at least on Amazon. My sister did say she saw the Lanisoh brand pads for a cheaper price at Target the other day. Do your homework if price is an issue. However, 60 pads will cost about $12 so about 20 cents a pad seemed worth it to me.
Happy nursing!
Thursday, June 9, 2011
Off to bed... Continued!
Just a quick update on the sleeping habits of our infant. I'd mentioned our routine in my previous post and how it can include multiple attempts before the baby goes down for good. This used to involve a rotation between my husband and I to share the workload. As of today, this is the fourth night in a row where she has refused to let my husband put her to bed. She won't let him be the first one to try. She just starts crying and yelling at him until I pick her up and she instantly calms. Tonight, she wouldn't let him be the second person to try either. She dozed off for a few minutes, just to wake up crying. When he picked her up it escalated to the same yelling episode she just had moments earlier. Well tonight took three attempts to get her down. That third one I didn't even bother asking for help. It may sound harsh but with our son I used to look forward to the evenings when my husband would put him to bed. It took that moment when I finally felt like I could relax and unwind and pulled it in just a few more moments earlier in the evening. Now I realize with our daughter it'll really be on me to get her down and that has me a little worried. I hope it's just a phase. For now I do cherish the time we spend snuggled up before going to sleep. These days are short lived. But even still I'd like to feel comfortable knowing that someone else can put her to sleep if for some reason I wasn't around.
Monday, June 6, 2011
Off to bed...
I'll start by saying both of my kids are the best when it comes to sleeping through the night. They both were sleeping 7-8 hours at 8 weeks old. Now at 11 weeks, our daughter sleeps at least a 10 hour stretch. I'd like to blame luck, and give the kids the credit, but maybe we're doing something right too.
We have a bedtime routine. It's really the routine for our son with some added steps for the baby mixed in. She starts to show signs of being ready for bed before 8 pm, but we put her to bed after our son since she takes a little more work to put down.
First we bathe one or both kids and get them in their PJs. We make sure both rooms are darkened and beds are dressed. Then we sit on the couch with them and read stories. The last book of the night, we put the pacifier in our son's mouth, which really puts him in a drowsy state. After he's put in bed I finish up nursing the baby and asses the situation. Our son would nurse to sleep at this age. My husband could just pick him up and lay him down. The girl is another story. Only about one time in twenty is she like that. Normally she appears wide awake, alert, looking around, even cooing. When she starts to put up any fuss we take her to her room, swaddle her tight, and start pacing around her room with a bounce in our step. The past 4 nights she has refused to let my husband put her down. We tried again tonight, and she just cries and cries. I can tell it's like she's saying she wants her mommy... The moment I take her she calms down and I can get her down in 5 to 10 minutes. Only half the time does one time do the trick. Usually you lay her down and she's there for 5 minutes then she starts whimpering again. I go in and do the same hold, bounce, and just wait. The final moments before laying her down I will stop bouncing and stand still. Try to do this while she's still slightly awake. I read in a book that if they fall asleep under certain conditions then they wake up in different conditions this can be enough to upset them back to being awake. So by pausing and standing still at least she'll know that sleeping means no movement. I lay her down and put my hand on her chest for a moment as she makes a little shift to get comfortable. When she doesn't open her eyes I know she's ready. Tonight it just took two tries, so not bad.
While it is cute to think that my baby prefers my scent, my special touch for getting her to sleep, it does make me worry if this becomes a trend. She needs to be able to cope with someone else putting her down in case I'm not there for any reason. Hopefully this is just a phase. I do know that our son doesn't require any rocking and hasn't for some time. I'll soon miss these days...
Sunday, May 29, 2011
Favorite Breastfeeding Book
Short but sweet, the book I used the most when our first was born was a gift from my aunt who lives on the central coast. She gave it to me on day three of our son being with us, and not a day too soon. The Nursing Mother's Companion is the ultimate resource for the breastfeeding mother. I learned more from that book than I did in the hospital, and our hospital is well known for having the highest percentage of breastfeeding mothers in the state, and perhaps the nation. Granted this gave me a good start for support, but I also was determined to have a baby who was EBF (exclusively breast fed). It was from this book that I really came to understand the feed on demand technique. It explained how there are specific times in the baby's early development where they will have growth spurts, and that cluster feeding is completely normal. I also better understood how breastfeeding was really the law of supply and demand and the moment you introduce formula into the mix, you are already on a downhill slope.
I loved this book so much that I sent it to Germany when my friend had her baby. She successfully breastfed for over a year before weaning her son. Next the book was forwarded to my sister in law in London, who started her breastfeeding experience being told her milk would never come in. She is doing fabulously feeding her quickly growing girl born in December. I've also given this book as gifts, and recommended it to anyone who asks me for breastfeeding advice. Hence why I'm recommending it to you!
I loved this book so much that I sent it to Germany when my friend had her baby. She successfully breastfed for over a year before weaning her son. Next the book was forwarded to my sister in law in London, who started her breastfeeding experience being told her milk would never come in. She is doing fabulously feeding her quickly growing girl born in December. I've also given this book as gifts, and recommended it to anyone who asks me for breastfeeding advice. Hence why I'm recommending it to you!
Friday, May 27, 2011
What They Say...
I'd like to take a moment to debunk a few myths and confirm a few others perhaps. These all revolve around the differences between my two kids. I'll jump to the moral first: there is no method to the madness, and you just have to go with what hand you're dealt. That said, here we go.
Myth #1: Baby #2 is always early
My OB said our daughter broke every rule. She wasn't early, she was 6 days late. That's even later than my son, who was only 2 days late.
Myth #2: Baby #2 is always bigger, but girls are smaller
This one I can sort of confirm. Our daughter was 8 pounds 4 ounces, and while our first was 8 pounds 9 ounces. That difference in weight is almost unnoticeable honestly. Neither kid wore newborn sized clothing for more than two weeks. So many cute things went to waste...
Myth #3: Girls are easier
This one I want to confirm as well. I remember that our son was sleeping 7 hours at 7 weeks old, so I sort of made that my benchmark. When you're getting up twice a night to feed during those first couple weeks you want some sort of hope, something to set your sights on to help you get through the tough days. On day 3 this girl slept a 6 hour stretch. Yes, it was sort of a fluke, but I swear that night gave us the good start to get us through it all. Now at just 2 months, she sleeps 9 to 10 hours and I'm not getting up to feed at night anymore. That early morning feeding happens in bed, while I'm half asleep. It's awesome. Plus, I hold her a lot, but far less than I did with our son. She's super happy to lay in her gym or sit in her bouncy chair. She LOVES having her diaper changed!
Myth #4: The second child is the opposite of the first
I heard this one the other day because a couple had their second. Instead they had the girl first and the boy is just 4 months old. Their daughter was sleeping through the night at 4 months, but now their son can't even fall asleep on his own. Everyone at this gathering agreed with this concept and I kept my mouth shut. As I described my experience with Myth #3 my second is more similar to our first. They look so much alike, but their sleeping habits are both amazing. They both grow like little bean poles and I love them both more than anything else in the world!
Wednesday, May 25, 2011
Toy Cleaning
I saved a number of infant toys from my son for my daughter to play with. They were stored away in a container in the garage some place for almost two years before making their recent debut. There were a number of techniques I used depending on the type of toy being cleaned.
The plastic key type toys and rattles were easy. Without actually fully submerging in water, you can simply use hot soapy water in the sink.
There were a few toys that were either plastic or plush, but that had some sort of electronic component to them. I have a set of keys with a stop light type handle that lights up red and green when you push the buttons. And my favorite toy of my son's infancy, a plush inch worm with sections that either make sensory sounds like crinkles or squeaks and also plays a song when you squeeze it's head, required special handling. These types of toys you can surface wash. But, I these toys were in my son's mouth. The inchworm was taken to Europe and I must admit, hit a dirty train station floor or two before the trip was done. I did some research on the web before going with the Lysol technique. Follow the instructions on the bottle for the disinfectant spray. Essentially you can mist the toy until covered, but not soaked, and let dry. Repeat this process for especially filthy toys.
 Lastly, there are the occasional stuffed animals that require another technique. My son has a favorite, his hop-hop. This is a dare I say cheap Easter bunny, who at last Easter was practically the size of my son, who has been his lovey ever since. Finally after spotting actual stains on his white cheeks, most likely caused by a milk drip or two from a breakfast on the couch watching cartoons on PBS, I decided Hop needed a bath. I simply put Hop in a pillow case, tied one end, and put him through the wash. I washed him with the baby blankets from both cribs on the gentle cycle. Then I dried the whole load on low. Hop came out stain free and looking like a million bucks!
Tuesday, May 24, 2011
Nursing Pillows
I have two nursing pillows. One is the standard Boppy that everyone has. The other is a My Brest Friend. My routine with my son was to keep the Boppy in the living room and the MBF in the bedroom. This allowed me to nurse in varying positions like the football hold and the standard cradle during the day. This is helpful in those first few weeks you start breastfeeding so you get evenly worn so to speak.
I'm not sure if the Boppy lost some fluff in the year and a half since it's last use, but it is not the wonderful pillow I remember. To be honest, I use it as a back pillow now and a standard bed pillow to hold up the baby. Again this can be shoved on my side or held across my lap and gives me the same flexibility while nursing on the couch. (Course to really complain, our pillows are down so they're way too soft and I'm constantly torquing the pillow to get it the way I want it, but even that is easier than using the Boppy). The pillow can't be all bad though. Everyone I know has one at some point or another while they have a baby. My sister has a great technique for giving her 3 week old son tummy time, and he falls asleep on her lap while straddling the Boppy and loves it. However, after starting to nurse my second child it has lost it's luster for me personally.
What makes the MBF so great you ask? Well for starters it's a firm foam pillow. It holds one shape, and that's it. It wraps around your body, and you clip it on, so it stays in one place. There are two bumps on either side of the front of the pillow which help position the baby's head turned slightly upward. This is an ideal nursing position otherwise you have to support both your breast and the baby's head which gets old. I like to use my free hand to play on my cell when I'm up at 4 am! The part that wraps around your waist has a great back support. While I feed on the couch I find myself leaning forward or trying to keep more upright and this gets tiring. When the MBF is in the right spot, I can relax and lean back and not worry about the baby slipping or shifting. I've used if outside a few times and it fits great while I sit on plastic outdoor chairs. The other day I even used it to nurse while I caught up on emails, hands free!
If I could do it all over again with my first I'd wish for two MBFs. It does seem a little lazy since I could really just carry the one pillow wherever I needed it. But in the beginning when you're tired you don't want to go to bed and wake up for a late night feeding and realize you forgot the pillow in some other room you're not sure where. But, now that our little girl sleeps mostly through the night, I'm almost ready to move the MBF to the living room for good!
Goals and Points
I have to admit I actually typed my first entry days ago, maybe even over a week ago... I tried to stock up entries so I could publish something every day even if things were too busy to keep up the blog. Things are even tougher than that. Basically by the time the kids are asleep I've lost most motivation to do anything but sit on the couch and veg out.
Last night was a great example. Our son only took an hour and twenty minute nap when he usually naps 3 hours. He seemed chipper when he woke up so I didn't push him going back to sleep. Plus, I really couldn't. I had to hold our two month old daughter because she had her check-up today and got four vaccines, three shots in the thighs and one oral. The poor thing is extra cranky but extra tired so holding her most of the day was the only solution. Anyway, the lack of nap really catches up to the boy after dinner is done. Getting out of the bath is a struggle. He refuses to brush his teeth. He gets hysterical with Daddy and asks for Mommy only to perform the same routine with me. Both kids are then crying and the parents are about to lose it and then... I snap out of it. I take the poor baby to our room to nurse and let Daddy deal with the boy. Somehow we get both kids in bed, after the girl wakes up a couple times and finally settles down. It's really enough to make someone crazy, and yet, it's the typical night in so many households with children.
I really like blogging though, and I really want to keep it going even if things are nuts. I have tons of ideas of things I want to write about, I just need the time to do it. So here we go again.
I'm going to start with entries about how things compare between caring for our two children. Some products and techniques are the same and yet some new discoveries have made our time with our daughter a little easier. Maybe some of the lessons I've learned can help others. We'll see!
Monday, May 23, 2011
I'm Baaaack!
I must apologize for the long hiatus. I finally had that baby girl of mine! She arrived 6 days late, but she was worth the wait. The nurse in the delivery room said she must have been waiting to be born an Aries on the first day of spring. Plus, the date is hard to forget: 32111 (3/21/11). Life with two little ones has been rather exciting, but besides the lack of free time, it has provided me with a growing list of favorite products and tips to share. I promise to do my best to keep up the blog better.
In addition to adjusting to our life as a family of four, my younger sister is going through an adjustment of her own. She became a first time mom on April 26th to a beautiful boy. I could not be happier my big boy has a little sister and a boy cousin! Here is a picture of the new best friends:

In a reality note, I'm sitting on my couch, an hour after both kids are officially asleep, watching the latest episode of Glee and typing on my computer. There is a basket of laundry to do, a room of toys that need picking up, and a sewing project that has been calling, but all I have the energy to do is sit on the couch and type. Things will get better, easier, it's just a matter of time.
Monday, March 14, 2011
Not Laboring...
I gave birth to my son two days after my due date. My due date for baby #2 is tomorrow. I did not think there was a chance I'd still be pregnant at this point, but there you have it. My babies like to bake fully I suppose.
The point of this entry is to inform other expecting mothers to be skeptical of any natural inducing methods you might hear or read about. I've tried everything except ingesting anything outside of normal nutrition and I have not experienced any sort of effect.
I have no plan to be induced, nor do I want any other interventions like having my membranes stripped or anything like that. I plan to let the baby come when she's ready. That said, I'm ready, where is she?!?
I've tried spicy food. Activity wise, sex has had little to no effect. I've tried stimulating some pressure points I read about, and that didn't bring on one single contraction. I am walking every day about 30 minutes. I just read an article saying I should probably do more. I did however add curb walking to the routine. I can say today I feel like the baby might be lower, but is that from the walking or just because that's the natural progression of things? Who can tell. I'm also following advice I heard from my sister in-law to rock in a rocking chair. I feel like I have to keep something up or else it's like I'm not trying hard enough to have this baby, but I've all but lost faith that we really have much impact on when labor starts. I think it's up to this kid. Hopefully she wants to meet the world soon, cause we sure want to meet her!
Friday, March 11, 2011
Pooping...
When it comes to cloth diapering, poop is probably the biggest fear and hurdle many parents face. As I'd mentioned before, when we had a service we never really dealt with poop. Sure we wiped our son's bottom, but that was the extent of it. Leave it to the service to take care of...
 The other 20% of the time for us is typically when we don't have a liner in, or the liner has shifted and isn't really giving the proper coverage inside the diaper. Today for example, I changed a poopy diaper and then did not put a liner in the next diaper, figuring that was his nap diaper and it would only be pee. I was wrong, I got to change two bombs in a row. I didn't freak out though, I have a diaper sprayer! This sprayer attaches to the plumbing at the back of the toilet. We don't have ours nicely rigged to the wall or anything, it sits around the bottom of the toilet out of the way. The water pressure is relatively good, and with a little patience you can spray the remaining poop particles off the diaper without getting your hands dirty. Having a pail in the bathroom close by would be a good idea. For now I have to ring out a bit of the water and walk the diaper to the laundry room. You should wash your hands after changing a diaper anyway, so it doesn't phase me too much.
Now we don't have that luxury anymore. It has to be dealt with in one way or another... There are two products we use that really reduce the grossness of handling a poopy diaper. The goal behind using these items is to reduce the amount of actual poop touching that might occur. Trust me, I know it's different when it's your own kid's poop, but I still find it pretty disgusting.
Even back in the day when our parents were cloth diapering, the first step to cleaning a poop diaper is to shake as much of the poop itself into the toilet. With toddler poop that can sometimes be all it takes, but it's not a guarentee. One way to assist the clean break between poop and diaper is a flushable liner. We use GroVia BioLiners. I chose this product because it seemed a bit wider than the other liners that were available at our diapering store. I simply lay the liner on the top of the diaper before putting it on our son. It's a little tricky with a prefold using my standing up technique, but when it's in the diaper the right way it can be a real life saver! In our experience this alleviates 80% of the poop handling you might have to do.
 The other 20% of the time for us is typically when we don't have a liner in, or the liner has shifted and isn't really giving the proper coverage inside the diaper. Today for example, I changed a poopy diaper and then did not put a liner in the next diaper, figuring that was his nap diaper and it would only be pee. I was wrong, I got to change two bombs in a row. I didn't freak out though, I have a diaper sprayer! This sprayer attaches to the plumbing at the back of the toilet. We don't have ours nicely rigged to the wall or anything, it sits around the bottom of the toilet out of the way. The water pressure is relatively good, and with a little patience you can spray the remaining poop particles off the diaper without getting your hands dirty. Having a pail in the bathroom close by would be a good idea. For now I have to ring out a bit of the water and walk the diaper to the laundry room. You should wash your hands after changing a diaper anyway, so it doesn't phase me too much.
I've read that breastfed newborn poop is water soluble and doesn't require rinsing. I'm still a bit skeptical as I don't want to put poop straight in the washing machine. At least with the presoak step in my washing routine I could probably deal with the newborn poop in the utility sink first. Toddler poop on the other hand needs to be removed as much as possible before washing, so I'm glad I use liners and a sprayer or I wouldn't know what to do!
Tuesday, March 8, 2011
Dirty Diaper Storing...
How we store our dirty diapers between washings does seem to go against logic, but that's because most diaper pails are designed in such a way that they lock in the odors and don't let them escape. It turns out, with cloth diapers anyway, if you leave them in an open pail exposed to the air they smell far less. Some could argue you can't smell our pail at all (unless of course you put your nose physically on the diaper I'd imagine).
I was skeptical at first. When we had the diaper service we were incredibly lazy with our diapers. It mortified my mother to hear that we wouldn't even shake out the poo before putting it in the pail. We have a Graco Touch Free diaper pail which appears to be unavailable today... The concept was you could wave your hand near the pail and the lid would open and you'd put the diaper in and the lid would close. The design of the depository area was such that it didn't allow much air to escape from the bag where the diapers ended up. It was magical in theory, but didn't really work well for cloth. The diapers just fit in the depository and the lid didn't always automatically lift as expected. We started to just lift manually, which worked OK anyway. Since a cloth diaper took up more space in the pail, we were changing the bag more often then one would if they were using disposables. I will say the odor protection seemed to work fabulously however. I just feel awful for the service delivery guy who had to pick up our stinky bags every week, ewe!
When we moved to home laundering our habits had to change and we had to shake and rinse off poop because we weren't washing every day and the dirty diapers were to be stored inside (we did keep them in the garage for a bit, but that was such a pain).
 The solution I found was actually this rolling pet food container from The Container Store. I excluded the lid, but kept it around in case this open air theory didn't pan out and I wanted to keep in the smells (the lid is now thrown away). I thought having the wheels would make it easier to transport outside or to move the pail out of the way in the laundry room if needed. Then I got a Planet Wise pail liner. Theoretically you could use this liner even if you used disposables. It helps cut down on the use of plastic trash bags. This bag was the right size for the container I had chosen, and I liked that it came in a large variety of colors. I chose purple because at the time if was the first color my son could say, and it seemed to be his favorite. The volume of the container and the liner are plenty for the 3 day wash cycle we use. There's plenty of room, even when we start to diaper two kids.
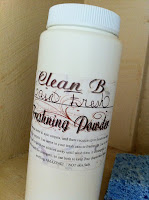 I wash the pail liner with the diapers every other wash or so. It hang dries while the diapers dry. If I feel like the pail could smell a little fresher between washes, I sprinkle some Clean B pail refresher on top of the diapers. This is completely unnecessary, but I got the powder at the same time I bought the wipe solution because it sounded like a fun thing to try. I can honestly say, if you make sure there's no actual poop on the diapers in the pail, there is no odor when you use this method.
I was skeptical at first. When we had the diaper service we were incredibly lazy with our diapers. It mortified my mother to hear that we wouldn't even shake out the poo before putting it in the pail. We have a Graco Touch Free diaper pail which appears to be unavailable today... The concept was you could wave your hand near the pail and the lid would open and you'd put the diaper in and the lid would close. The design of the depository area was such that it didn't allow much air to escape from the bag where the diapers ended up. It was magical in theory, but didn't really work well for cloth. The diapers just fit in the depository and the lid didn't always automatically lift as expected. We started to just lift manually, which worked OK anyway. Since a cloth diaper took up more space in the pail, we were changing the bag more often then one would if they were using disposables. I will say the odor protection seemed to work fabulously however. I just feel awful for the service delivery guy who had to pick up our stinky bags every week, ewe!
When we moved to home laundering our habits had to change and we had to shake and rinse off poop because we weren't washing every day and the dirty diapers were to be stored inside (we did keep them in the garage for a bit, but that was such a pain).

 I wash the pail liner with the diapers every other wash or so. It hang dries while the diapers dry. If I feel like the pail could smell a little fresher between washes, I sprinkle some Clean B pail refresher on top of the diapers. This is completely unnecessary, but I got the powder at the same time I bought the wipe solution because it sounded like a fun thing to try. I can honestly say, if you make sure there's no actual poop on the diapers in the pail, there is no odor when you use this method.
Monday, March 7, 2011
Recipe - Freeze Ahead Sicilian Casserole
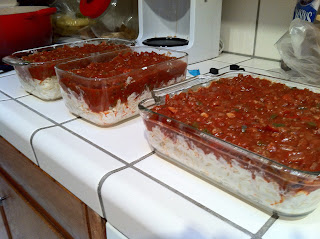
I wanted to share my go-to freeze ahead recipe. Yesterday I wanted to stock the freezer with foods that would be just heat and serve for when the baby arrives. I also just got frozen lasagnas from the supermarket, but this recipe is a little more homemade and my family loves it. I can't take any credit though, I follow a recipe to the T that I found online. For the full recipe, you can find it here (http://busycooks.about.com/od/groundbeefrecipes/r/siciliansupper.htm)
I took the recipe and loosely multiplied everything by one and a half. I found that this actually made more like twice the volume of casserole and I ended up with two glass loaf pans and one 2 quart baking dish worth. The loaf pans are the perfect size for our family of 3 for one meal, we had one last night. It left basically a serving spoon scoop full that I then gave our son for lunch today. The 2 quart baking dish can serve four relatively well.
What I used (again, see original recipe for actual proportions):
1.5 lbs ground beef
1 giant yellow onion, chopped
3 cloves of garlic, minced
2 bell peppers (1 red, 1 green)
1.5 cans (6 oz) tomato paste
1 can (15 oz) tomato sauce
Slightly over 1 cup water
1.5 tsp Italian seasoning
1 package (almost 4 cups) elbow macaroni
1.5 packages (8 oz) cream cheese (full fat, mmm)
Slightly over 1 cup whole milk
About 8 oz (second half of sour cream container after making chicken and rice casserole) sour cream
Parmesan cheese
 I boiled the water and cooked the pasta per the package instructions. Meanwhile, I browned the beef with the onion and garlic. When the beef is almost done, added the bell peppers. I like to use the two colors, even though the recipe calls for green, cause it adds a nice color to the pot. When the beef is browned, drain well, and add the tomato paste, tomato sauce, water, and seasonings and simmer.
 Meanwhile, cube the cream cheese and put it with the milk in a microwave safe bowl. Microwave 3 minutes on medium level (I used Level 6, and we have a weak microwave). Pour the cheese mixture to a large bowl and whisk until smooth. Then add the pasta and the sour cream and about a half cup of parmesan cheese, mix well. If you plan to serve same day, you're golden. If you plan to freeze ahead, add 1 heaping table spoon of cornstarch to the cheese/pasta mix.
Spoon the pasta mixture into the dishes first. Then top with the sauce. Sprinkle more parmesan on top (I actually didn't have enough to do this last part this time, but I can add it to the top when I defrost and reheat). Wrap tightly in foil and bake for 25-35 minutes, remove cover, and bake 10 more minutes or so, until casserole is bubbly.
 To freeze, I put a layer of plastic wrap on first to reduce the amount of air exposure to the casserole. Then it gets wrapped tightly in foil, which can be used when reheating. Take the casserole from the freezer to the fridge one day in advance to defrost. I would suggest baking a bit longer, maybe 45 minutes covered, if the casserole isn't fully defrosted.
I took the recipe and loosely multiplied everything by one and a half. I found that this actually made more like twice the volume of casserole and I ended up with two glass loaf pans and one 2 quart baking dish worth. The loaf pans are the perfect size for our family of 3 for one meal, we had one last night. It left basically a serving spoon scoop full that I then gave our son for lunch today. The 2 quart baking dish can serve four relatively well.
What I used (again, see original recipe for actual proportions):
1 giant yellow onion, chopped
3 cloves of garlic, minced
2 bell peppers (1 red, 1 green)
1.5 cans (6 oz) tomato paste
1 can (15 oz) tomato sauce
Slightly over 1 cup water
1.5 tsp Italian seasoning
1 package (almost 4 cups) elbow macaroni
1.5 packages (8 oz) cream cheese (full fat, mmm)
Slightly over 1 cup whole milk
About 8 oz (second half of sour cream container after making chicken and rice casserole) sour cream
Parmesan cheese
 I boiled the water and cooked the pasta per the package instructions. Meanwhile, I browned the beef with the onion and garlic. When the beef is almost done, added the bell peppers. I like to use the two colors, even though the recipe calls for green, cause it adds a nice color to the pot. When the beef is browned, drain well, and add the tomato paste, tomato sauce, water, and seasonings and simmer.
Spoon the pasta mixture into the dishes first. Then top with the sauce. Sprinkle more parmesan on top (I actually didn't have enough to do this last part this time, but I can add it to the top when I defrost and reheat). Wrap tightly in foil and bake for 25-35 minutes, remove cover, and bake 10 more minutes or so, until casserole is bubbly.
 To freeze, I put a layer of plastic wrap on first to reduce the amount of air exposure to the casserole. Then it gets wrapped tightly in foil, which can be used when reheating. Take the casserole from the freezer to the fridge one day in advance to defrost. I would suggest baking a bit longer, maybe 45 minutes covered, if the casserole isn't fully defrosted.
Sunday, March 6, 2011
Dino Rolling...
 I buckled down and finished Steggie, the pull dino I started in this post. I had sewn 99% of his body, and just needed to add a bit more fluff and then sew closed his tail. Then I sewed on buttons for eyes. He was pretty cute! At this point the rolling stand needed to be constructed. The directions asked for a 5x7 piece of wood, which is the default size for an unfinished wooden plaque you can get at any craft store. I happen to have a wood worker in the family, but this piece was inexpensive and already constructed, so I only asked for his help drilling the holes in the sides for the wheel axels.
 Then the wheels, axels, and plaque needed to be painted. Since the fabric of Steggie's skin was red with brown details I decided to paint the surfaces a chocolate brown. My son even helped with the painting. I used a gloss finish acrylic paint so it would be a bit shiny without requiring a clear top coat.
After everything was dry I put in the wheels and axels and then added an eye screw to the front of the plaque. To this I tied a piece of ribbon. The end by the plaque I hand sewed so it wouldn't slip, and then the other end I added a bead with a knot on either side so the bead would stay put. The ribbon was dark blue with a red thread border and the bead was brown to match the stand.
Lastly I took the other sides to the velcro and glued them in line with where the feet would go. I mentioned in my original post that the velcro pieces were probably too big, and the feet were a bit of a pain to sew. So, the velcro pieces weren't lined up the same and matching them on the stand does look a little off, but oh well, that's how handmade goes sometimes. My advice would be to use smaller pieces next time, perhaps more square in shape. Well, so the glue didn't quite work as well as I'd hoped on the glossy painted surface, so my handyman tapped in tiny nails to hold the velcro down, which was definitely more functional.

Friday, March 4, 2011
Nursery Decorating...
Well I think it's 99% official, the nursery is ready for our little girl to arrive. With my strong nesting urges these days I can't guarantee I won't move something around or reorganize something in the closet, but for the moment I'm pleased with the results.
 We received these butterflies to hang instead of a mobile at our baby sprinkle last weekend. I'd mentioned before, we received this soother and an adorable stuffed turtle, whose colors fit everything perfectly. I wanted a better way to set up the baby monitor since we just propped it up between the crib and the wall with our son. This could have been a huge safety hazard, so I suppose we're lucky nothing ever happened. The cord is still probably not in it's final resting spot, but at least we can thread it away from the crib itself. I can also put some small light-weight decorations on the shelf in the future. Nothing heavy should be placed up there. There were a few cute items at our baby sprinkle that I should be receiving soon that might work.
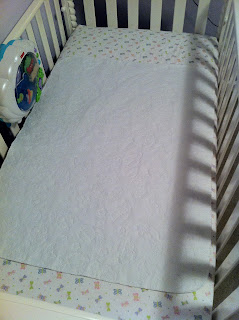 Both our son's crib and the new crib are set up in the same fashion when it comes to bedding. I read somewhere that it's a good idea to put two layers of waterproofing on the mattress. This way, if there is an accident in the middle of the night, you can strip off one layer of sheet/mattress cover and deal with remaking the bed at a more convenient hour. So, both cribs have a fitted mattress pad with a fitted sheet, then a mattress cover that's just a lay down rectangle with a jersey knit sheet on top. I like the feel of the softer sheet, and smaller pad is easier to remove in case it needs to be removed quickly. I purchased this Gerber knit sheet because I liked the hearts, but I must agree with the reviewers on the Babies R Us website. The elastic on the sheet is too small and is much too tight of a fit. It won't be removed easily, so I have it on there for looks I guess, until our first leak or spit-up on it. After that point I have a couple plain white ones that will work just fine. I opted to go without the mesh breathable bumper this time around. Our son slept best swaddled up as tight as possible, so he barely moved during the night. We'll assume our baby girl will be the same, but you never know! One thing I really like about this crib is it has a drawer underneath. It can't hold a lot, but it's perfect because it has two sections. One side I put my spare changing pad covers and the other side I put the swaddling blankets.
 The changing table is the same one from our son's room. I'm not one who cares a lot about my furniture coordinating (as you can probably tell). The baskets underneath are the same too. In each of the four baskets I currently have baby socks and burp cloths on the top shelf, shoes/booties and hats on the bottom shelf. Next to the changing table is a repurposed night stand. The basket on the bottom is filled with cloth diapers, although these will have to wait a while before being used. We are being given 3-6 months of diaper service as a baby gift, and those are always prefolds. Those will go on the top shelf of the changing table. In the drawer of the nightstand are the covers. My mom actually gave me my old nightlight from when I was a kid. It's this adorable mushroom with a butterfly theme painted on it. Lastly, I got myself an Itzbeen timer. I was looking for a small clock to put on the nightstand to keep track of feeding times at night, and I came across this timer. I look forward to reviewing it once I can put it in use, but essentially it helps you keep track of changes, sleeping periods, and time between feedings. There is also a switch at the bottom that helps you keep track of what side you started your last breastfeeding session on. With our son I had a hand written journal type, so this seems much more convenient. The rocking chair is a family heirloom that again we moved from our son's room when we stopped rocking him to sleep before bed. The finishing touches are a lavender baby blanket with butterfly detail, and some wall art we already had lying around that were the right color scheme.
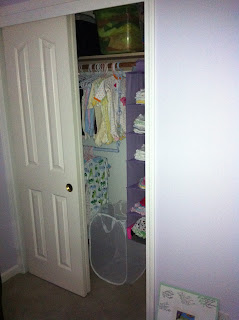 As for closet organization (of course the most exciting part of the nursery I'm sure), I got a cheap pop-out hamper and this cool closet extender. I couldn't believe that with a second child, and only small opportunities to receive gifts, we had entirely filled the closet rung to capacity. Thank goodness baby clothes are short! But, from experience with how many clothes my son accumulated, I knew this was going to be a problem. The extender practically doubled the hanging space! In addition, I had ordered this hanging shelf in lavender a while back since there is no room for an actual dresser in the nursery. I hang most everything as a result, except these shelves allow me to store all my onesies and plain Gerber t-shirts. I also needed two shelves for bloomers of all things. All these adorable dresses and skirts require some sort of diaper covering, something I didn't realize I'd need since I was having a girl, but now I appreciate. The top shelf of the closet is rather deep, and I can stack two plastic storage containers high inside. I've got two full of infant toys, and one with larger hand-me-down items that just don't fit in the hanging space quite yet. I also have my pump and my carriers up there.
The final detail I must mention is the beautiful quilt hanging on the side of the crib. This was handmade by my mother in-law. Her craftsmanship is something to be envied for sure. She let me pick the fabrics and the pattern which meant I got exactly what I wanted. It was her first time doing applique, but you'd never know it. Enjoy these pics of the masterpiece, as well as the rest of the room!


Monday, February 28, 2011
Recipe - Chicken & Rice Casserole
Tonight we're having chicken and rice casserole, so I thought it'd be a good opportunity to share the "recipe". I put the word recipe in quotes only because it's a bit on approximations, but that makes it easy to remember. It is also what you'd call "semi-homemade". This means it's a combination of packaged and fresh ingredients. Make no mistake, this recipe is pretty high calorie, and may not present well for anything formal, but it makes a great hot, comforting meal for a family. Also, because of the approximations used in the recipe, it is easy to double. The directions below will be for a family of two, or two plus a toddler! It takes approximately 10 minutes to assemble and an hour to cook and cool.
You will need:
1 box Rice A Roni (used Creamy Four Cheese tonight)
Butter
1 can cream of chicken, or cream of chicken and mushroom, or cream of mushroom depending on preference
8 oz sour cream
Grated cheddar (or other cheese of choice)
Water
2 breasts of chicken
Broccoli (optional)
First, brown the Rice a Roni with butter per the box instructions. Once browned, pour rice into a square baking dish.

Meanwhile, mix together the can of cream of chicken soup, approximately 8 oz (or eyeball half a 16 oz container), the flavor packet from the Rice a Roni, approximately 1 cup of grated cheddar cheese, and half the water indicated on the box of rice instructions. Whisk this together and pour over the rice mixture. Give a loose mix, just to get the grains of rice mixed a little.
 Then, rinse and dry the chicken breasts and place them on top of the mixture. In most cases the chicken will sink below the liquid level, but if not, spoon a bit of soup mix on top so the chicken is covered.
Tonight I did a side of vegetables, but sometimes I add broccoli to the casserole. In this case I cut the pieces into flowerettes and stick them in the soup sauce between and around the chicken. Again I spoon some of the mixture on top so that the surfaces are covered. This just helps things get cooked more evenly.
Lastly I add another cup or so of grated cheese to the top and cover tightly with foil. Bake at 375 for 45 minutes. Then remove the foil cover and cook another 5 to 10 minutes. Remove from oven and let sit at least 5 minutes or more before serving.

The finished product is a bit soupy, but like I said before, it tastes so good and it's such a warm comfort food you won't complain!

You will need:
1 box Rice A Roni (used Creamy Four Cheese tonight)
Butter
1 can cream of chicken, or cream of chicken and mushroom, or cream of mushroom depending on preference
8 oz sour cream
Grated cheddar (or other cheese of choice)
Water
2 breasts of chicken
Broccoli (optional)
First, brown the Rice a Roni with butter per the box instructions. Once browned, pour rice into a square baking dish.

Meanwhile, mix together the can of cream of chicken soup, approximately 8 oz (or eyeball half a 16 oz container), the flavor packet from the Rice a Roni, approximately 1 cup of grated cheddar cheese, and half the water indicated on the box of rice instructions. Whisk this together and pour over the rice mixture. Give a loose mix, just to get the grains of rice mixed a little.

Tonight I did a side of vegetables, but sometimes I add broccoli to the casserole. In this case I cut the pieces into flowerettes and stick them in the soup sauce between and around the chicken. Again I spoon some of the mixture on top so that the surfaces are covered. This just helps things get cooked more evenly.
Lastly I add another cup or so of grated cheese to the top and cover tightly with foil. Bake at 375 for 45 minutes. Then remove the foil cover and cook another 5 to 10 minutes. Remove from oven and let sit at least 5 minutes or more before serving.

The finished product is a bit soupy, but like I said before, it tastes so good and it's such a warm comfort food you won't complain!

Saturday, February 26, 2011
Linen Closet Organizing...
Call it spring cleaning or call it nesting, either way I have been wanting to clean out our linen closets for some time. We have two in our hallway, one you would designate for towels since it's closer to the bathroom, and one that would be bed linens. These lines became a bit grayed, items were folded and stuffed in any which way, and it had been driving me nuts for months.
Our closets had not been relined since we moved in. The previous owner had lined the shelves with this horrid floral tack paper. They didn't even bother taking out the tacks from the liner before that! The edges were all peeling up because the paper was only attached to the tops of the shelves, not wrapped around the front or anything. You can see a sample of how this looked in the picture of the other linen closet below.

I removed all remnants of the previous inhabitants, and lined the shelves in plain white. Then, I went and got media storage baskets to hold the washcloths. The master hand towels and washcloths are in a DVD basket on the second shelf and the baby washcloths are the right width for a CD basket on the fourth shelf between the two types of towels for the hall bath. We have space at the bottom of this closet to store our random sleeping bags, and the top shelf is holding our TP, tissues, and baby bath seats. The space at the top of the closet is under utilized for sure. Perhaps an additional shelf in the future might be nice. We even have one more shelf I could put more items in (I put our case of wipes there for now), but since the closet has such a nice clean look at the moment, I don't want to randomly stuff anything in there.

I've taken the first step with the bed linen closet (status seen in top picture above) and cleaned out the items we don't use anymore, but that's as far as I've taken it as of today. That might be my Sunday project!
Our closets had not been relined since we moved in. The previous owner had lined the shelves with this horrid floral tack paper. They didn't even bother taking out the tacks from the liner before that! The edges were all peeling up because the paper was only attached to the tops of the shelves, not wrapped around the front or anything. You can see a sample of how this looked in the picture of the other linen closet below.

Finally I'd had enough. I consulted my resident expert, Martha Stewart, on the best approach to cleaning up our act. I had my birthday recently and I'd put a few of her books on my Wish List, one being her Homekeeping Handbook. For closets she recommends taking inventory of what you have first, getting rid of items you haven't used in a few months. Then for towels, sort the items by room then by size. We have two bathrooms, the master and the hall bath. We had a million old towels from even college days, so it felt so good to get rid of them. I saved a few to put in our fish tank and I used one old one for pieces I'll eventually try to make wipes out of. Other than that it left two sets for the master, and two sets for the hall bath. Also in the hall bath I needed to include baby hooded towels and washcloths.
I removed all remnants of the previous inhabitants, and lined the shelves in plain white. Then, I went and got media storage baskets to hold the washcloths. The master hand towels and washcloths are in a DVD basket on the second shelf and the baby washcloths are the right width for a CD basket on the fourth shelf between the two types of towels for the hall bath. We have space at the bottom of this closet to store our random sleeping bags, and the top shelf is holding our TP, tissues, and baby bath seats. The space at the top of the closet is under utilized for sure. Perhaps an additional shelf in the future might be nice. We even have one more shelf I could put more items in (I put our case of wipes there for now), but since the closet has such a nice clean look at the moment, I don't want to randomly stuff anything in there.

I've taken the first step with the bed linen closet (status seen in top picture above) and cleaned out the items we don't use anymore, but that's as far as I've taken it as of today. That might be my Sunday project!
Friday, February 25, 2011
Wipe Making...
 Last night I finished my first batch of home-made baby wipes. I chose to make the majority of them out of flannel. I showed you the original fabric selection in this post, although I also cut up one of the receiving blankets we received at the birth of our son that we rarely used. All the wipes I've made so far have been dual layered. I put some "knit jersey" fabric on the back of some. I even cut up pieces of an old towel to put terry cloth on a couple. The rest are dual layered flannel.
 I chose to cut 8 and a half inch sized squares. This size allows for an approximately 8 inch square wipe, large enough to cover your hand. I used the technique of sewing the two squares right sides together. Then I trimmed the corners, leaving a few inches un-sewn so that I could then turn the wipe inside (or right-side) out. I pressed the wipe and top stitched the entire outside to hold it together. In some cases I tested out the zig zag stitch on my lovely machine (which I definitely need more practice using). I think the end result looks pretty, but function becomes the next discussion.
 Lastly I washed and dried the wipes and folded them to fit in a Huggies disposable wipe container. Again, my praise goes to YouTube and to the maker of this video, a great demonstration of how to fold, store, and use home-made wipes. I ended up with 12 wipes to start. This will work for the time being since my son doesn't need many diaper changes a day, but when the infant arrives this will be inadequate.

I saved a few pieces of the receiving blanket as well as the old towel to try a completely new technique I'll have to blog about later. When I was looking for instructions on how to make wipes, I found a few designs that suggested using a serger or overlock machine. I happened to ask around and a good friend of my mother in-law had one she'd never used. To be honest it's still in the box, but that's on my list of things to try before the baby arrives. In any case, with the serger I can make single layered wipes, rounded edges, I look forward to experimenting.
See, single layered wipes might work best, especially with the terry cloth model. I used one of the dual flannel ones today with the morning change. This was just a pee diaper though, so it wasn't very messy. In any case, I use an eight ounce travel bottle with pull nozzle to store the wipe solution. I have a Clean B concentrate that I then add water to. The solution did not absorb into the wipe quickly. This makes me want to change my solution container to a spray bottle as suggested by the YouTube video.
Monday, February 21, 2011
Prefolding...

I, however, do not have an infant. In fact, I don't even use the changing table anymore. This is actually good so I can move it into the nursery for baby girl to use when she arrives. I have a toddler who loves to test mommy's patience when it comes to diaper changing time. He will lay down on occassion for Daddy or Yamma (grandma), but he pretty much refuses to lay down for me (unless I put an iPad in his hands). So I've adapted, and learned to put on a diaper, using the same fold and Snappi, while he's standing up.
 Basically I fold down the front of the diaper a few inches first, then fold the front into thirds. I leave the back opened up. Typically I add a flushable liner to catch poop, or in this case since he was getting ready for a nap, an extra insert for absorbency.
Most of the time my son will spread his legs some when I tell him to so I can get that diaper situated. Then while he faces away from me, I use my knee to hold the back against his bottom and I can reach around the front, securing the sides of the back around the front with the Snappi clip.

In the case of this afternoon when these pictures were taken, I had a pull up variety cover, but you can use a similar technique when putting on a snap or aplix cover. Pull up the pants, and boom, done.
We did have a recent episode with a bacterial infection, so I've been extra cautious the last few days when cleaning up after poop. This standing up change doesn't really give you the best view of all the possible creases and cracks that might need cleaning. So, I have been lying him down when there's a poop. But, I did notice how shoddy my technique has become when putting the diaper back on in this position. I'd better get practicing for when the infant needs me to change her!
Sunday, February 20, 2011
Faster Drying...
Now this project was one where a simple idea, and a little too much time on the internet, snowballed into something way too complex. I would go as far as to agree with my husband on this one, I'm a crazy person...
 First I had to learn how the heck you unravel a sweater. Turns out there are YouTube videos for everything, including one I highly recommend that teaches the proper technique. Then I had to get the sweater to unravel. I had visions of finding a sweater as awesome as the one unraveled in the before mentioned video, but that's not what happened. I went to Goodwill, where sweaters weren't the $1 I was hoping. After almost an hour flipping through rack after rack I narrowed down my choice to two sweaters, one chunkier light reddish number, and a neutral, much finer yarned merino wool sweater. I went with the neutral colored sweater because I thought I could get more out of it, and it was the whole 50 cents cheaper, costing me $5.49.
 I took the sweater apart as best I could. Whenever a string would be broken, I'd just tie knots to connect the next strand. I started off thinking I would unravel the sweater and then once the whole thing was unraveled I would then wind up the dryer balls. Really this turned out to be more like double work, more craziness on my part... I unraveled both front and back as well as the neck piece before realizing it would be easier to just unravel and wrap onto a ball in one effort. Also, with the yarn being so fine, it was taking forever to get to the four to five inches in size that the directions were asking for. I also began to realize I wasn't going to make the four or so balls out of the one sweater. But, I'd started this project, I was going to finish! I gathered three more packages of wool yarn from a fabric store and used a white to make the inner section of the balls. I was going to make five in all.

 After you have your four to five inch sized balls, you put them in a knee high and separate them with a tie of non-wool thread. Then you wash on high and dry on high, to felt the wool. It's sort of like taking a wool sweater and washing and drying it on high. The fibers sort of shrink, soften, and stick together. After felting once, you wrap more yarn to make the balls six to eight inches in size then repeat the washing/felting process. Then, the balls are ready to use. My finished products came out in varying sizes because of the yarn supply and my color choices.

I was poking around, looking for solutions to hard water. I came across this ball that has some magnet in it or something that causes some reaction to the compounds in the water, causing them to rinse away easier rather than build up on your clothes. But really that doesn't matter. That topic began my search about dryer balls. Some people in my cloth diapering group brought up "eco friendly" or wool dryer balls, and how they got them on Etsy. When you search on Etsy for wool dryer balls, you will be amazed how many there are available. These balls cost anywhere from $5 to $8 a piece, and they recommend you use at least four for there to be any positive effect. What effect are we talking about here? The theory goes that these balls cause there to be air gaps and this speeds up drying time. Also, dryer balls cause a small amount of friction that then decreases static. I don't usually experience static with my diapers, but these balls can be used for all types of laundry. So the price seemed steep to me, so I looked around for instructions on how to make your own. Essentially all you need is 100% wool yarn and the patience to wrap this yarn into a ball. Think this has gone far enough? Oh boy, are you in for it now. Some people don't buy new wool, but they do what's called "upcycling". They take wool sweaters, unravel them, and use their yarn for other things. I was going to go all in on this one, I was going to take it all the way. That is what made me feel crazy, at many points along the way, as you'll see.
 First I had to learn how the heck you unravel a sweater. Turns out there are YouTube videos for everything, including one I highly recommend that teaches the proper technique. Then I had to get the sweater to unravel. I had visions of finding a sweater as awesome as the one unraveled in the before mentioned video, but that's not what happened. I went to Goodwill, where sweaters weren't the $1 I was hoping. After almost an hour flipping through rack after rack I narrowed down my choice to two sweaters, one chunkier light reddish number, and a neutral, much finer yarned merino wool sweater. I went with the neutral colored sweater because I thought I could get more out of it, and it was the whole 50 cents cheaper, costing me $5.49.
 I took the sweater apart as best I could. Whenever a string would be broken, I'd just tie knots to connect the next strand. I started off thinking I would unravel the sweater and then once the whole thing was unraveled I would then wind up the dryer balls. Really this turned out to be more like double work, more craziness on my part... I unraveled both front and back as well as the neck piece before realizing it would be easier to just unravel and wrap onto a ball in one effort. Also, with the yarn being so fine, it was taking forever to get to the four to five inches in size that the directions were asking for. I also began to realize I wasn't going to make the four or so balls out of the one sweater. But, I'd started this project, I was going to finish! I gathered three more packages of wool yarn from a fabric store and used a white to make the inner section of the balls. I was going to make five in all.
 After you have your four to five inch sized balls, you put them in a knee high and separate them with a tie of non-wool thread. Then you wash on high and dry on high, to felt the wool. It's sort of like taking a wool sweater and washing and drying it on high. The fibers sort of shrink, soften, and stick together. After felting once, you wrap more yarn to make the balls six to eight inches in size then repeat the washing/felting process. Then, the balls are ready to use. My finished products came out in varying sizes because of the yarn supply and my color choices.
I thought this would be a nice project because I'm really pregnant now, and sitting on the couch is pretty much what my evenings have entailed lately. I figured I could wrap yarn in a ball while I sat here and it would be simple and satisfying. I'd say now that I'm done it maybe had that effect, but there were many moments sitting here that I felt like I was losing my mind. And is all the effort worth what I'll get out of it? I will be drying diapers with these balls, especially soon because I can't hang dry in this weather, and I would like to try and decrease my energy consumption. But, the idea I had in the beginning, of making these as gifts for friends because it seemed so quick and simple, not so much. I'll pass on the info about how to make your own, that's my gift to you.

Here are the instructions if you're interested:
Saturday, February 19, 2011
Failing...
I started my leave on Friday, and so far I'm failing on all three of my leave resolutions.
First off, I have not blogged every day. I don't want to say I'm running out of steam. More like I have a few topics to blog about but I want to wait until the projects I'm working on are a little further along before reporting.
Secondly, I wanted to hang dry my diapers on laundry days. Well, this one's not my fault, but it's raining cats and dogs here in Northern California so I'm handcuffed to using the dryer (I guess I could hang dry around the house, but I'm not that patient).
Lastly, I was hoping to take my son out on our first day together, but life has a way of throwing you a curve ball every now and then. The rain makes it impossible to go do something outdoors, and bacterial infections that require a doctor's visit and a trip to the pharmacy keep you from checking out the local library...
Let's not also admit that we've had fast food for lunch the last two days also. At least I have a home cooked meal planned for tonight!
Wednesday, February 16, 2011
Crib Decorating...
 While we have most of the staples in place for the new baby, the baby's room is not complete from an organizational and design standpoint. Luckily when we first repainted the bedrooms, I chose a light lavender colored paint for the nursery. I guess back then I had wishful thinking we were going to have a girl.
 Then, we were given a hand-me-down crib from a good friend. This was a blessing because we're really not ready to move our son out of his crib yet, and this way his life doesn't have to have one extra disruption when the new baby gets here. The new crib is white, while our son's is wood. I am so excited to give the new crib its own look without having to spend a fortune.


The last detail is I ordered a white small wall shelf to put on the wall near the crib. With our son, we just propped the baby monitor between the crib and the wall and it sort of sat there precariously. Looking back if he was more mobile during this time, that could be a real danger with the cord hanging so close to reach. This new little white wall shelf will hold only light items, like the monitor, and maybe a tiny stuffed animal for looks. My husband says this shelf will be tough to hang, and then won't be able to hold anything heavy. That's OK though, that's not its purpose.
Subscribe to:
Posts (Atom)